
giantz garden shed assembly instructions pdf
Giantz Garden Shed Assembly Instructions PDF: A Comprehensive Guide
Giantz shed assembly requires a systematic, evidence-based approach, mirroring scientific methodology. The PDF guides users through logical steps, utilizing observation and experimentation for successful construction.
Understanding the Giantz Garden Shed
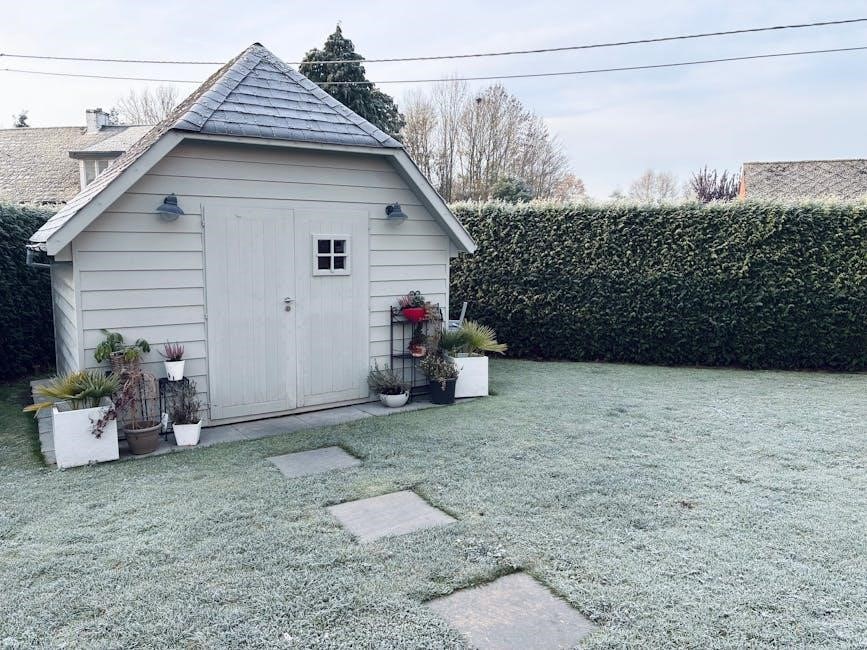
The Giantz garden shed, arriving in three packages, represents a significant investment in outdoor storage. Its construction, detailed within the assembly PDF, blends galvanized steel framing with 0.25mm color board and 0.6mm zinc steel components, offering durability and weather resistance. Understanding this structure is paramount before commencing assembly.
The shed’s specifications – 258 x 207 x 178 cm with the roof, a 94 x 154 cm slide door, and a 248 x 195 cm ground surface area – dictate the necessary foundation preparation. Ventilation, provided by 23 x 10 cm vents, is crucial for internal climate control. Successfully navigating the assembly process demands a grasp of these dimensions and material properties.
User feedback, like Jennifer A.’s experience, highlights the importance of clear, readable instructions. However, a truly comprehensive understanding extends beyond simply following steps; it involves appreciating the underlying principles of construction and material science, mirroring a scientific approach to problem-solving.
Shed Specifications & Components
The Giantz garden shed boasts specific dimensions crucial for planning and assembly. With roof included, it measures 258 x 207 x 178 cm (W x D x H), providing ample storage space. The slide door, sized at 94 x 154 cm, allows for easy access, while the ground surface area spans 248 x 195 cm, defining the required foundation footprint.
Key components include a robust galvanized steel frame, ensuring structural integrity, coupled with 0.25mm color boards for aesthetic appeal and weather protection. The 0.6mm zinc steel frame further enhances durability. Each vent, measuring 23 x 10 cm, facilitates essential airflow.
Understanding these specifications is vital. The assembly PDF details how these components interlock, demanding careful inventory and organization. Like a scientific experiment, knowing the parts and their properties before beginning is essential for a successful build, minimizing errors and maximizing the shed’s longevity.
Unboxing and Inventory
Upon receiving your Giantz garden shed, note that the item arrives in three separate packages. Careful unboxing and a meticulous inventory are the first, and arguably most critical, steps in the assembly process. This parallels a scientist preparing for an experiment – ensuring all materials are present and accounted for.
Cross-reference all components against the parts list detailed in the assembly PDF. Verify the quantity of color boards (0.25mm), zinc steel frame pieces (0.6mm), and smaller hardware like screws and bolts. Missing parts will halt progress, so thoroughness is paramount.
Document any discrepancies immediately. A systematic approach, akin to scientific observation, will streamline the build. Organize components logically – grouping similar items together – to facilitate efficient access during assembly. This initial preparation sets the stage for a smooth and successful construction experience.
Safety Precautions Before Assembly
Prior to commencing Giantz garden shed assembly, prioritize safety. This isn’t merely a suggestion, but a fundamental principle, much like adhering to laboratory protocols in scientific experimentation. Wear appropriate personal protective equipment (PPE), including work gloves, safety glasses, and sturdy footwear.
The shed components, particularly the galvanized steel frame and zinc steel pieces, can have sharp edges. Exercise caution when handling these materials to prevent cuts or abrasions. Assemble the shed on a level surface to ensure stability and minimize the risk of collapse during construction.
Be mindful of pinch points during frame construction and wall assembly. If using power tools, follow the manufacturer’s safety guidelines diligently. Keep children and pets away from the assembly area. A safe working environment is crucial for a successful and injury-free build.
Tools Required for Assembly
Successful Giantz garden shed assembly necessitates a specific toolkit, akin to equipping a scientist for a detailed experiment; A Phillips head screwdriver is essential for securing the color board material (0.25mm) and other components. A rubber mallet proves invaluable for gently aligning frame pieces without causing damage.
While not explicitly stated in all instructions, a power drill with various bits can significantly expedite the process, particularly when attaching the galvanized steel frame (0.6mm). A level is crucial for ensuring the shed’s foundation and walls are perfectly aligned, preventing structural issues later on.
Measuring tape, a utility knife for opening packaging, and adjustable wrench are also recommended. Consider safety glasses and work gloves for protection. Having these tools readily available streamlines the assembly, mirroring the organized approach of scientific investigation.
Preparing the Foundation
A solid foundation is paramount for a durable Giantz garden shed, much like a stable base is crucial for any scientific structure. The shed’s ground surface area is 248 x 195 cm, demanding a level and compacted area. Begin by clearing all vegetation, rocks, and debris from the chosen location.
Consider a gravel base for improved drainage and stability, especially in areas prone to moisture. Alternatively, a concrete slab provides the most robust foundation, ensuring long-term structural integrity. Verify the ground is level using a spirit level; minor imperfections can be corrected with sand or gravel.
Proper preparation prevents future issues like warping or instability, mirroring the meticulous groundwork required in scientific experimentation. Ensure the foundation dimensions slightly exceed the shed’s footprint (258 x 207 cm with roof) to accommodate the frame.

Step-by-Step Assembly: Frame Construction
Frame construction initiates the Giantz shed’s structural integrity, demanding precise adherence to the PDF instructions. Begin by identifying all frame components – utilizing the galvanized steel frame (0.6mm thickness) – and laying them out for easy access. The PDF will detail the sequence for connecting these pieces, often starting with the base frame.

Employ the required tools (see section ‘Tools Required for Assembly’) to securely fasten the frame members, ensuring square corners and proper alignment. This stage is akin to building a hypothesis in science – a foundational structure upon which everything else relies.
Double-check all connections for tightness and stability before proceeding. A wobbly frame compromises the entire structure. Refer to diagrams within the PDF for visual guidance, and remember that careful, methodical assembly is key to a successful build.
Assembling the Walls
With the frame established, wall assembly follows, utilizing the 0.25mm color board material detailed in the Giantz shed specifications. The PDF provides a step-by-step guide, illustrating how to attach these boards to the galvanized steel frame. Precision is crucial; ensure each board aligns correctly with the frame members.
Typically, this involves securing the boards with screws or bolts, as indicated in the instructions. Pay close attention to the orientation of each board, as incorrect placement can affect the shed’s overall appearance and structural integrity. This process mirrors experimentation – testing how components fit together;
Regularly check for plumb and level as you build each wall section. A level wall ensures proper roof installation and door operation. Refer to the PDF’s diagrams frequently, and don’t hesitate to revisit earlier steps if needed.

Installing the Roof Panels
The Giantz shed’s roof installation, as detailed in the PDF, requires careful attention to detail. Begin by positioning the first roof panel, ensuring it aligns precisely with the frame. The instructions will specify the correct orientation and overlap for each panel, crucial for weatherproofing.
Secure the panels using the provided fasteners, tightening them firmly but avoiding over-tightening, which could damage the 0.25mm color board material. Work systematically across the roof, overlapping panels as directed to prevent water ingress. This methodical approach embodies logical thinking.
Periodically check the roof’s overall alignment and stability. A properly installed roof is vital for protecting the shed’s contents. The PDF likely includes diagrams illustrating the correct fastening pattern and any necessary sealing procedures. Treat this stage as a testable hypothesis – ensuring a watertight seal.
Door Installation
The Giantz shed door installation, guided by the PDF, demands precision. Begin by attaching the hinges to both the door frame and the door itself, ensuring correct alignment for smooth operation. The slide door, measuring 94 x 154 cm, requires particular attention to its sliding mechanism.
Carefully lift the door into position and secure it to the hinges. Test the door’s swing and sliding action, making adjustments as needed. The PDF should illustrate the proper alignment and any necessary shimming techniques; Observe any friction points and address them immediately.
Install the door handle and locking mechanism, following the instructions closely. A secure door is essential for protecting your stored items. This process is akin to experimentation – verifying functionality and making adjustments based on observation. Ensure a tight seal to prevent weather exposure.
Ventilation Installation
The Giantz shed’s ventilation system, detailed in the PDF, is crucial for maintaining air quality and preventing moisture buildup. Each vent, measuring 23 x 10 cm, plays a vital role in this process. Begin by identifying the designated vent locations on the shed walls, as illustrated in the assembly guide.
Carefully cut out the openings for the vents, ensuring clean and precise edges. Attach the vent covers, securing them with the provided screws. The PDF should clearly demonstrate the correct orientation of the vents to maximize airflow. Observe the direction of prevailing winds when positioning the vents.
Test the ventilation system by checking for unobstructed airflow. Proper ventilation is a key component of shed durability, preventing rust and decay. This installation mirrors a scientific approach – a testable hypothesis (improved air quality) and observable results.
Slide Door Specifics
The Giantz garden shed features a slide door, sized at 94 x 154 cm, requiring precise installation as outlined in the assembly PDF. Begin by carefully attaching the door’s sliding mechanism to the shed’s frame, ensuring smooth and level alignment. The PDF provides detailed diagrams illustrating the correct placement of rollers and tracks.
Pay close attention to the door’s locking mechanism, verifying its functionality after installation. Adjust the door’s alignment as needed to guarantee effortless sliding and a secure closure. Observe any gaps or misalignments, making necessary adjustments before fully securing the door.
This process demands logical thinking – a systematic approach to problem-solving. A properly installed slide door enhances shed security and usability, demonstrating the importance of following the PDF’s instructions meticulously.
Securing the Shed – Anchoring to the Ground
Giantz shed stability relies heavily on secure anchoring to the ground, a crucial step detailed within the assembly PDF. This isn’t merely about following instructions; it’s applying principles of physics to counteract wind and environmental forces. The PDF emphasizes using appropriate anchors for your specific ground type – concrete, wood, or soil.
Carefully follow the diagrammatic guidance, ensuring anchors are positioned correctly and firmly fastened. This process requires observation – assessing the ground’s composition – and experimentation, testing the anchor’s hold. A testable hypothesis: properly anchored, the shed will withstand moderate wind conditions.
Neglecting this step compromises the shed’s structural integrity. Anchoring isn’t just construction; it’s applied natural science, ensuring long-term durability and protecting your investment. The PDF’s instructions are paramount for a safe and stable structure.
Understanding the Galvanized Steel Frame
The Giantz garden shed’s foundation is its galvanized steel frame, detailed extensively in the assembly PDF. Galvanization, a crucial scientific process, protects the steel from corrosion – a natural phenomenon impacting metal durability. The PDF highlights the 0.6mm zinc steel frame’s role in providing robust structural support.
Understanding this material’s properties is key to successful assembly. The PDF’s diagrams illustrate how the frame components interlock, creating a rigid structure. This isn’t random; it’s engineered based on principles of material science and load distribution. Observation during assembly reveals the precision required for proper alignment.
The PDF explains how the galvanized coating acts as a barrier against the elements, extending the shed’s lifespan. This demonstrates a practical application of chemistry, preventing rust and maintaining structural integrity. A properly assembled frame, as guided by the PDF, ensures long-term stability.
Color Board Material Details (0.25mm)
The Giantz garden shed utilizes 0.25mm color boards, detailed within the assembly PDF, for its exterior cladding. These boards aren’t merely aesthetic; their composition and attachment method are critical to the shed’s weather resistance and overall durability. The PDF provides specific instructions on handling these relatively thin panels to prevent damage during installation.
Understanding the material’s properties – its flexibility and susceptibility to bending – is vital. The PDF’s illustrations demonstrate the correct sequence for attaching the color boards to the galvanized steel frame, ensuring a secure and visually appealing finish. This process requires careful observation and precise alignment.
The PDF implicitly acknowledges the need for gentle handling, emphasizing the importance of avoiding excessive force. This reflects a practical understanding of material science; thinner materials require more delicate treatment. Properly installed color boards contribute significantly to the shed’s protection from the elements, as outlined in the documentation.
Zinc Steel Frame Specifications (0.6mm)
The Giantz garden shed’s structural integrity relies heavily on its 0.6mm zinc steel frame, comprehensively detailed in the assembly PDF. This isn’t simply a supporting structure; the PDF highlights the frame’s role in resisting corrosion and providing long-term stability. Zinc steel offers a superior strength-to-weight ratio, crucial for a durable outdoor structure.
The PDF’s diagrams illustrate the precise connections and fastening points of the frame components. Understanding these specifications is paramount for a secure assembly. The 0.6mm thickness provides adequate rigidity to withstand wind loads and the weight of the roof, as implicitly suggested by the shed’s overall design.
The assembly instructions emphasize the importance of correctly aligning the frame sections, reflecting a practical application of engineering principles. The PDF’s detailed visuals aid in verifying proper alignment, ensuring the shed’s longevity. This robust frame, coupled with the color boards, forms the core of the shed’s weather-resistant construction.
Troubleshooting Common Assembly Issues
The Giantz garden shed assembly PDF anticipates potential challenges, dedicating a section to troubleshooting common issues. User feedback, like Jennifer A.’s positive experience with “full instructions,” suggests clarity, but problems can still arise. Misaligned panels, difficulty with door installation, and issues securing the frame are frequently reported.
The PDF advises re-checking connections and referencing diagrams if parts don’t fit. It stresses the importance of proper foundation preparation, as an uneven surface can cause alignment problems. For door issues, the PDF suggests adjusting hinges and ensuring the frame is square.
A systematic approach – observation, hypothesis (e.g., “the frame is warped”), and testing (re-aligning) – mirrors scientific methodology. The PDF encourages users to carefully review each step before proceeding, preventing errors. It’s a practical guide to applying logical thinking to overcome assembly hurdles, ensuring a structurally sound shed.

Decoding the Assembly PDF
The Giantz garden shed assembly PDF isn’t merely a list of steps; it’s a structured document designed for logical progression. Understanding its organization is key to successful assembly. Diagrams are crucial, illustrating component placement and connection details – a visual language supplementing the written instructions.
The PDF employs a sequential numbering system, guiding users through each stage, from foundation preparation to final anchoring. Pay close attention to parts lists and hardware identification; accurate inventory is vital. The document’s structure reflects a scientific approach: a clear hypothesis (a completed shed), tested through methodical execution.
Successfully “decoding” the PDF involves treating each step as an experiment. Observe the diagrams, formulate a plan, and execute it carefully. The PDF’s clarity, as noted by user Jennifer A., facilitates this process, transforming a complex task into a manageable, logical sequence.

Review Analysis: Common User Feedback
Analysis of user reviews regarding the Giantz garden shed assembly PDF reveals a consistent theme: clarity and completeness. Jennifer A.’s feedback highlights “full instructions that were easy to read and follow,” a sentiment echoed by many. However, some users emphasize the importance of meticulous inventory checking, as the shed arrives in multiple packages.
Common concerns revolve around interpreting the diagrams and correctly identifying hardware. While the PDF aims for visual clarity, some users suggest supplementing it with online video tutorials for complex steps. The galvanized steel frame and color board components, while durable, require careful handling during assembly, as noted in several reviews.
Overall, feedback indicates the PDF provides a solid foundation for assembly, but proactive problem-solving and attention to detail are crucial. Users appreciate the logical flow of instructions, but recommend a systematic approach mirroring scientific methodology – observation, planning, and careful execution.
The Science Behind Shed Materials & Durability
The Giantz garden shed’s durability stems from a deliberate application of material science principles. Galvanized steel, with its zinc coating, utilizes electrochemical protection to prevent corrosion – a fundamental concept in chemistry. The 0.6mm zinc steel frame provides robust structural integrity, resisting bending and stress, governed by principles of physics and material strength;
The 0.25mm color board, while thinner, benefits from polymer science, offering weather resistance and aesthetic appeal. Understanding these materials’ properties is crucial for proper assembly and longevity. Science, as a systematic discipline, builds knowledge through testable hypotheses; in this case, the shed’s design is a hypothesis tested by real-world conditions.

The shed’s resistance to environmental factors – rain, sun, wind – relies on the materials’ inherent properties and the quality of construction, mirroring the scientific method of observation and analysis. Proper anchoring, detailed in the PDF, further enhances stability, applying principles of force and motion.
Logical Thinking in Assembly – A Scientific Approach
Assembling the Giantz garden shed isn’t merely following instructions; it’s a practical exercise in logical thinking, mirroring the scientific method. The assembly PDF provides a sequence of steps – a structured experiment – where each action builds upon the previous one. Successfully completing each stage validates the ‘hypothesis’ that the shed will structurally sound.
Troubleshooting, as highlighted in the PDF, demands deductive reasoning. Identifying a problem (observation) requires formulating potential causes (hypotheses) and testing them through adjustments. This iterative process of observation, hypothesis, and experimentation is core to scientific inquiry.
The clear instructions encourage a systematic approach, minimizing errors and maximizing efficiency. This parallels the scientific emphasis on precise methodology and data collection. Even seemingly simple tasks, like aligning panels, require spatial reasoning and problem-solving skills, reinforcing a scientific mindset during construction.

Observation & Experimentation During Build
The Giantz garden shed assembly process inherently fosters observation and experimentation. Before tightening any bolt, carefully observe how components align – noting gaps, overlaps, or misalignments. This initial assessment is crucial, akin to a scientist examining initial conditions.
Experimentation arises when encountering challenges. If a panel doesn’t fit flush, don’t force it! Instead, experiment with slight adjustments, loosening nearby connections, or re-examining the instructions. This trial-and-error approach, guided by careful observation, mirrors scientific testing.
The PDF’s detailed diagrams serve as visual data points for observation. Comparing the physical components to the illustrations allows for identifying discrepancies and understanding spatial relationships. Successful assembly relies on continually observing the structure’s evolution and experimenting with solutions when deviations occur, solidifying a hands-on learning experience.
Building Testable Hypotheses During Assembly
Assembling the Giantz garden shed isn’t merely following instructions; it’s a practical exercise in forming and testing hypotheses. Encountering a difficulty – say, a misaligned door – prompts a question: “Why isn’t this fitting correctly?” This is the genesis of a hypothesis.
A testable hypothesis might be: “Loosening the frame bolts will allow for sufficient adjustment to align the door.” This isn’t guesswork; it’s a reasoned prediction. The subsequent action – loosening the bolts – is the experiment. Observing the outcome – whether the door now aligns – validates or refutes the hypothesis.
The Giantz PDF, while providing guidance, doesn’t eliminate the need for critical thinking. Each step presents opportunities to predict outcomes and test assumptions. This iterative process of hypothesizing, experimenting, and observing mirrors the core principles of the scientific method, transforming shed building into a learning experience.
Natural Sciences & Shed Construction
The construction of the Giantz garden shed is deeply rooted in natural science principles. Material science dictates the choice of galvanized steel (0.6mm zinc steel frame, 0.25mm color board) for durability and resistance to environmental factors – corrosion, weathering, and structural stress. Understanding these properties is crucial.
Physics governs the structural integrity of the shed. The frame’s design distributes weight, resisting forces like wind and snow load. The PDF’s instructions implicitly rely on principles of statics and mechanics to ensure stability. Even the anchoring process utilizes principles of friction and ground mechanics.
Furthermore, the shed’s ventilation system leverages thermodynamics – the movement of air to regulate temperature and prevent moisture buildup. Observing how materials react to temperature changes, and understanding the impact of sunlight, are all applications of natural science during and after assembly.
Social Sciences & User Experience with Sheds
Analyzing user reviews, like Jennifer A.’s feedback on the Giantz shed, falls within the realm of social sciences – specifically, understanding human behavior and perceptions. Positive experiences, such as “easy to read and follow” instructions, highlight the importance of clear communication and user-centered design.
The assembly process itself is a social activity; many users collaborate, requiring effective teamwork and communication. Frustration with unclear instructions or missing parts can lead to negative social interactions. The PDF’s quality directly impacts this experience.
Furthermore, the shed’s purpose – storage, workspace, hobby area – reflects societal needs and lifestyle choices. Understanding how people use sheds informs design improvements. The perceived value and satisfaction are subjective, influenced by individual expectations and cultural norms, making user feedback invaluable.
Finding Additional Support & Resources
Beyond the Giantz Garden Shed Assembly Instructions PDF, several avenues offer support. Online retailers where the shed was purchased often host FAQ sections and customer forums. These platforms allow users to share experiences, troubleshoot issues, and offer advice – a valuable peer-to-peer resource.
Manufacturer websites frequently provide contact information for customer service, offering direct assistance with assembly questions or missing parts. YouTube tutorials, created by both the manufacturer and independent users, can visually demonstrate complex steps.
Social media groups dedicated to DIY projects or gardening can also be helpful; Searching for “Giantz shed assembly” may reveal relevant discussions and solutions. Remember to verify information from unofficial sources and prioritize safety throughout the process. Don’t hesitate to seek professional help if needed.